Sales App - Introduction
Manage flight bookings on the go with the Sales App. Create, modify, or respond to requests, all from your mobile device.
Download Sales App
Play store: https://play.google.com/store/apps/details?id=com.fl3xx.mobileapp
Apple store: https://apps.apple.com/us/app/fl3xx/id492516229
Sales App - General Introduction
To ensure that your business is capable to react to any flight request at any time and anywhere, FL3XX developed the mobile Sales App. Sales employees can log in and pull up existing bookings to make changes or create new ones. You will also be able to send out Quote and other emails and receive the responses on your mobile device.
1. Navigate in the app
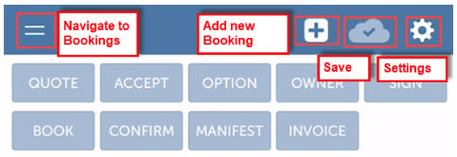
Hamburger Menu: tap on  the menu that opens all existing requests, options, and bookings.
Add New Booking: Tap on  which will open the booking form.
Save: While you are filling out the form, you can save the work in progress anytime, after the mandatory fields are added. Tap on 
Settings:  here you can directly report an issue with the app to FL3XX Support, you can switch on/off the notifications, and Logout from your app.
2. Left Hand Quotes and Bookings List
Tap on the hamburger menu  that opens the list of requests, options, and bookings.
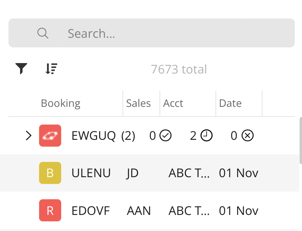
On the top, you can search by Booking number, date, or salesperson. You can also filter your bookings or sort them according to your preference.
Included in the list are key details such as the booking reference, the salesperson's acronym, the date of the initial passenger flight, departure and arrival airports with ICAO codes, as well as account information.
To see the details of a booking just tap on it.
3. Search Box
The LH-List features a very powerful Search Box in order to retrieve any Quote or Booking. You can search for a Quote ID, a customer name, an aircraft tail, or even a certain airport. The list will be reduced to the matching entries, and in the top right, you will see the total number of matching entries.
4. Sort & Filter
With a click on the ![]() icon you can sort the LH List by Creation date, Quote ID, Last modification date or date of first flight.
icon you can sort the LH List by Creation date, Quote ID, Last modification date or date of first flight.
You can also filter ![]() the list to only include Requests, Quotes, Bookings, Canceled, etc. Quotes/Bookings.
the list to only include Requests, Quotes, Bookings, Canceled, etc. Quotes/Bookings.
The default setting is
- Sort by Last modification
- Show All records
This will make sure that any new or modified request will appear on top of the list, and you don’t miss out on any update.
5. Status Color
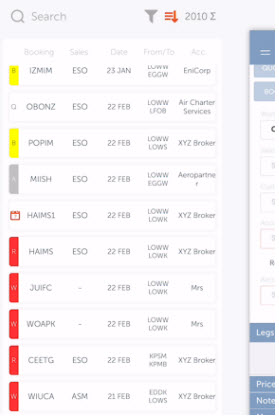
In order to make it easy to prioritize quotes, we apply a standard color scheme to all quotes on the left side:
- Red & flashing: Immediate Action is required & the flight is within the next 24h
- Red: Immediate Action is required
- Yellow: Action is required
- Blue: Standby, no Action is required
- Green: AOK, no Action is required
- Magenta: Revised. Things have changed, please update all concerned parties
- White: No Action is required, waiting for a response from the customer
- Grey: Not relevant anymore
If there are different versions of the same booking, you can expand and collapse the list with a single click.
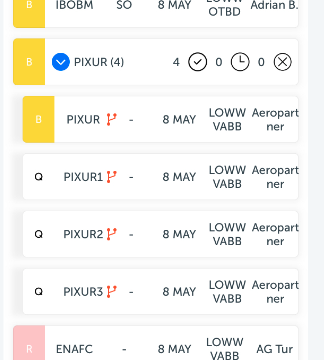
Typically the new requests that arrive are on top of the list in red, everything that has been taken care of will appear in an unobtrusive color underneath.
When you select a quote and want to view its details, the quote will be highlighted with an orange background. This indicates that you have currently selected this quote.

6. Status Letter
In addition to the Status Color, the Status Letter highlights the workflow step of the respective item.
The following letters are used:
- R – New Request
- a – New Avinode Request
- w – New Web Request
- Q – Quote (= Request that has been answered)
- A – Accepted Quote
- O – Owner’s Approval pending (if applicable)
- B – Booking (Quote that has been booked)
- F – Flights pending (everything else is done)
- C – Canceled Quote/ Booking
- D – Dropped (when the flights of an unanswered Request are in the past, the Request is Dropped automatically)
Main page
1. Create a New Booking
To start a new Booking, tap on  and start filling out the form. Follow the same steps as in the web app.
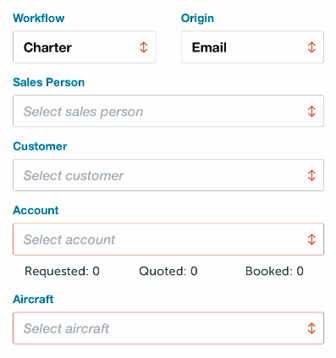
- Add the type of booking by selecting the Workflow, the Origin, the Salesperson, and the Account details, and then you can select an Aircraft.
Legs
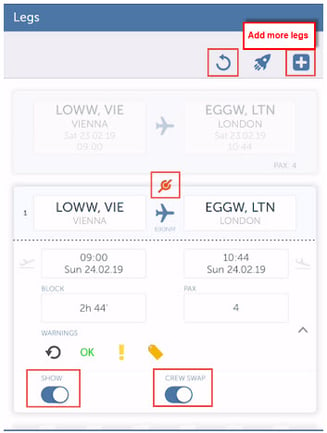
- Add the Flight Legs, to add more than one tap on

- After you added the DEP/ARR airports, DEP date, and time, FL3XX auto-calculates the flight time, runs an airport feasibility check, shows the airport-related warnings, and also checks if a positioning leg is needed. If the system finds a discrepancy in the schedule, it will suggest the positioning leg in grey. To add it to the Booking, tap on
 . To remove the positioning leg tap on
- Add the number of PAX, or 0 if it is a positioning flight
- Right under the PAX field tap on the arrow to open more options. Use the toggles to:

Positioning Flights are usually not shown in customer documents like the Quote, Confirmation, or Invoice. If you want to display a Positioning Flight in these documents, check the “Show” checkbox for this flight.
Crew Swap
![]()
Check this box, when a Crew Swap (CS) Fee should be applied for this arrival.
- When you added all flight legs, Save the booking by tapping on
 . The system auto-generates the Booking Number.

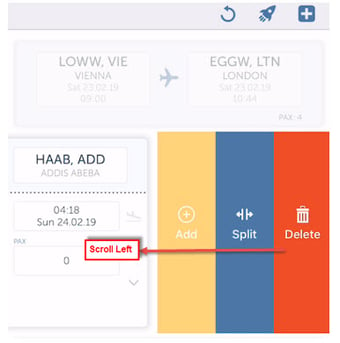
- If after saving you need to add, split, or delete a flight leg, slide the flight leg to the left where the three options appear.
Prices
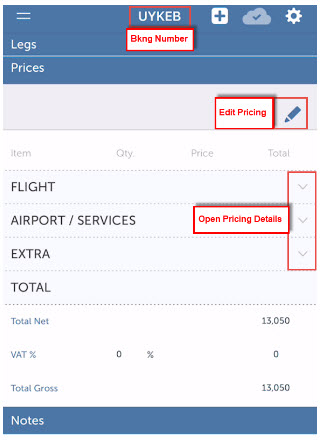
- FL3XX calculates the pricing that can be modified by you. To open the different pricing elements tap on the down arrows
 on the right side.
 - To modify the pricing just tap the field you would like to modify. Press Done to save the new values.
- After you made the changes, Save all the changes by pressing Save
 and the Quote gets updated.
Notes
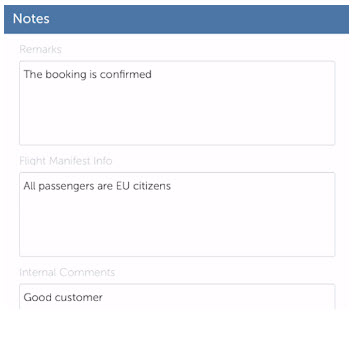
- You can add Remarks, Flight Manifest Info, and Internal Booking Notes. Tap on the text space in the Notes Section and add the text then Save
2. Send Quote, Owner Approval, Book, Confirmation, and Other Messages
- Once the booking is saved you can go ahead with the same customer/owner communication process as in the web app application of FL3XX.
- Scroll up to the top of the page and send a Quote by tapping on
 . It opens the Message page and shows the email you are about to send
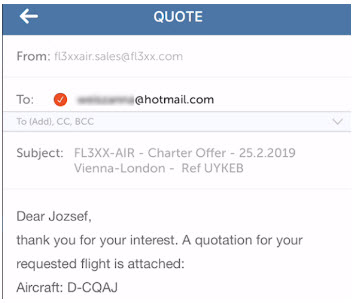
- Tap on Send Quote at the bottom of the page

- Once the Quote is sent follow the workflow at the top of the Booking page and send, confirm, book, or drop the Booking

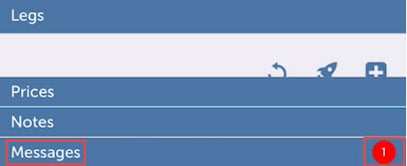
- To see all Booking-related messages that you sent, or received tap on Messages at the bottom of the Booking page. When you receive a response from the client or owner, the number of received messages appears on the bottom right.
- You can not only see the sent/received Messages but also reply to, or resend them. The sent messages are in normal text, while the received responses are in bold.
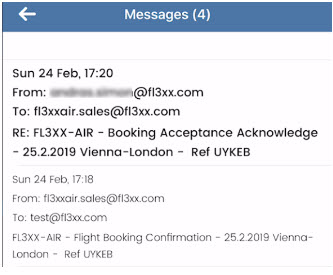
- To respond to a message, tap on it, and on the new page hit

- On the new page add your response and tap on
 at the bottom of the page
Email Suggestions for "To," "CC," and "BCC" Fields:
When you begin typing in the "To," "CC," or "BCC" fields, email suggestions will automatically appear after you enter at least three characters. A pop-up will display these suggestions based on your input. Additionally, suggestions can also be generated with just a single character. The results are drawn from your operator contacts stored in the FL3XX system, ensuring you have quick access to relevant email addresses.
Additional Features
Feasibility Check
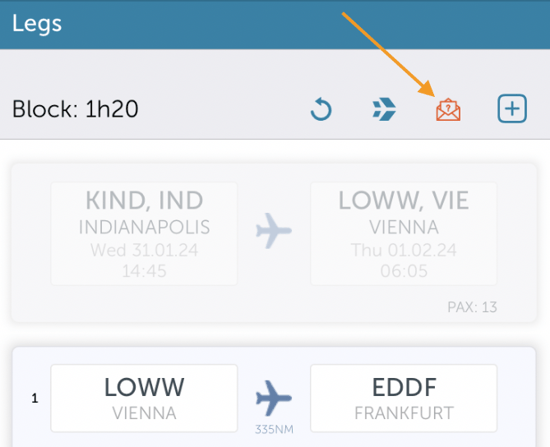
The Feasibility Check feature in the FL3XX Sales App streamlines flight bookings by offering real-time verification and updates for enhanced reliability. Users can initiate the feasibility check effortlessly with a dedicated button, ensuring the smoothness of their booking process.
Key aspects of the Feasibility Check feature include:
-
Feasibility Check Button: A prominent button within the mobile sales app allows users to trigger the feasibility check process seamlessly.
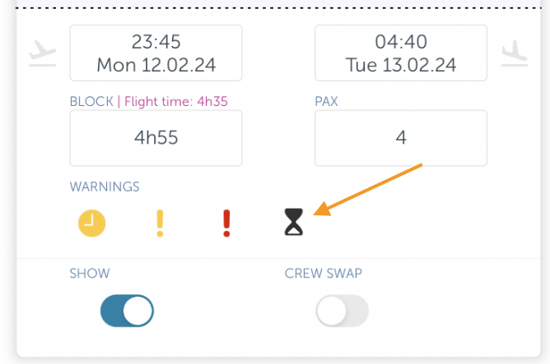
- Visual Feedback: During the check process, loading icons accompany warnings for each leg, offering visual cues to users.
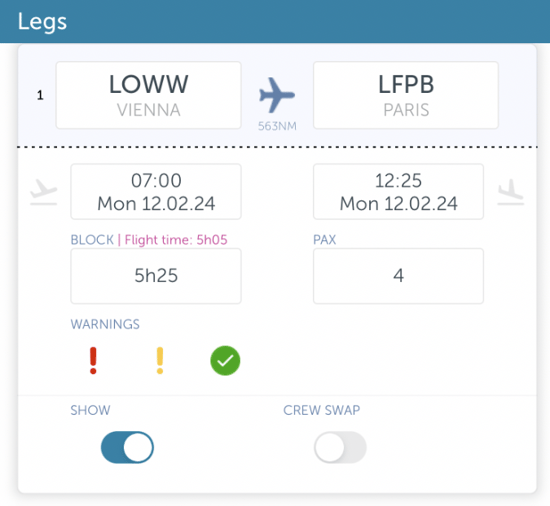
- Real-Time Updates: Upon manual feasibility check initiation, requests are dispatched for each leg, enabling real-time updates on the web app's Dispatch page.
Option Alive and Expired Icons
Similar to the web app, you can easily keep track of active Options and receive notifications when they expire using the Enhanced Option Icons with "Option Alive" & "Option Expired" icons.

During the Accept stage, users can click on the Option radio button, input the date and time for Validity, and then send the information. This action activates the option for the quote, displaying the corresponding icons.
The Option icons are visible on the LH side view when users create an Option. The "Option Expired" icon is shown when an Option is no longer valid or has expired.
Three-Decimal Precision for VAT/FET Fields
The VAT and FET percentage fields in the Sales app now support up to three decimal places, ensuring precise calculations and alignment with the web app functionality. This update prevents rounding discrepancies in percentages such as VAT/FET during quote preparation and other booking-related tasks. For example, percentages like 19.755% will now display accurately without rounding to 19.75%. Users can manually enter and interact with these precise values, and the app handles API responses and calculations seamlessly, reflecting three-decimal precision across all relevant data. Other percentage fields, such as surcharges, commissions, and discounts, remain at two-decimal precision.
Remarks
Our sales app is also adjusted to meet US requirements, including owner split calculation, profitability calculation, FET and other US-specific taxes and charges calculation, and Multi-Quote capabilities.
Avinode Fields in Quote Details (available on iOS)
Need to check Avinode prices on the go? You can now view Avinode-related details directly in the Quote Details section of the FL3XX iOS app—no need to switch to the web.
Step-by-Step Instructions:
-
Open a Quote
-
Go to the Sales tab and select a quote.
-
Scroll down—if Avinode data is available, a new Avinode section appears below Notes.

-
-
Check Avinode Info
-
See the Avinode Price, Message (like Trip ID), and Details (flight info, dates, etc.).
-
The info updates automatically, so you always get the latest.

-
-
Use Avinode Price
-
Tap Use Avinode Price to apply the Avinode rate to your quote.
-
Pricing updates instantly and reflects in your totals.

-
-
Compare on Avinode
-
Tap Compare on Avinode to open the full trip in your browser.
-
You’ll be taken directly to the quote in the Avinode Marketplace.

-
Good to Know:
-
The Avinode section only shows if data is available for the quote.
-
All buttons and fields work just like they do on the web.
-
Looks and feels like the rest of the app for a smooth experience.
