Expense Management
Crews on mobile devices and Dispatchers in the web app can add Expenses to flights, roster items, and aircraft for Accounting and Reporting.
Adding Custom Line Items in Settings
General Overview of the Expenses:
The Expenses are related to flights, therefore they are also tracked and collected in the related booking. It also has the Expense Report that gives a printable version of it.
Recently we added the possibility to add your own expense types in Settings that will be available for selection in the different Expenses throughout the system.
Expenses can be added by flight, DPE/ARR Airport and by Service in Dispatch, in the Maintenance events in the Timeline, in the Roster for certain items that were setup accordingly in Settings / Roster and in the Crew App
We also introduced the Invoice based filing, you can add an Invoice total amount and then break it down to line items.
All expenses are collected in the Booking broken down to flights and DEP/ARR airport services. With the last release the items are now editable within the booking.
The expenses can be locked by financial employees so that no changes can be done on them after
In the Expense Report the user can filter it by bookings and can export all Booking related expenses with the related Invoices into one PDF.
Adding Custom Line Items in Settings.
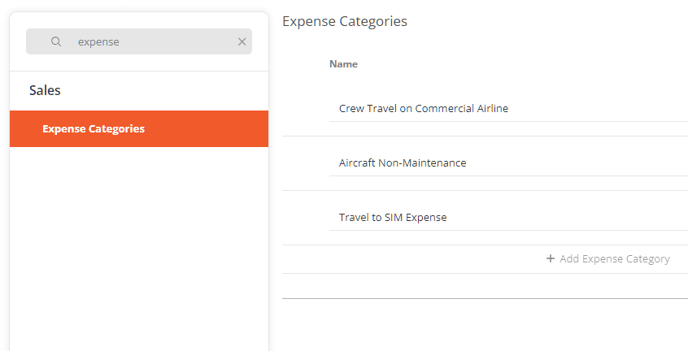
Go to Settings and either search for expense, or scroll to Sales / Expense Categories. Add your custom expense line items by clicking on the + Add Expense Category. Type in the name of the item you would like to add.
Webapp Expenses
Dispatchers can add different expenses in the Dispatch module on almost all pages. wherever you see the signs below on the screenshot, you can add an expense that will be attached to the related service.

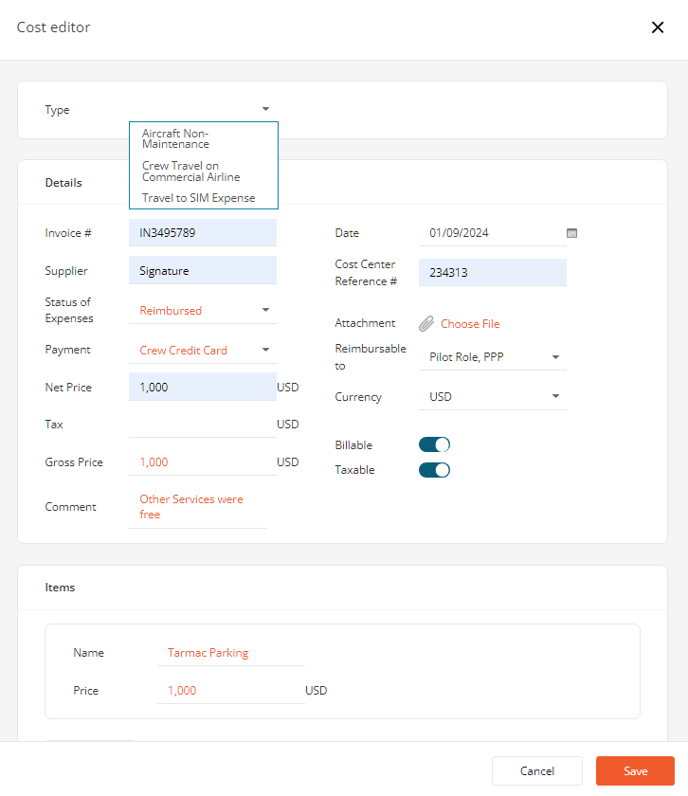
When you click on the +Add the below form opens where you can add the following data:
- The system auto assigns the location of the Expense, in the example below to Departure Hotel accommodation
- You can replace the the auto assigned Type name with one of your custom expense line item
- Add the Supplier
- You can relate the expense to an accounting system cost center
- Select the Payment type
- Determine whether the expense is reimbursable to one of the crew members, if yes, assign the crew member to whom the expense is reimbursable
- Select the status of the expense
- Determine whether the Expense is Billable and/or Taxable
- Add the Currency and the Net Price / Tax and the Gross Price
- Add the Invoice number if there is one
- You can also attach any document and add a comment
Once this is all done, you can add the Items of the Invoice one by one. Keep in mind that until the total of the line items is not equal to the Net Price, the system will not allow to save the record.
On the Sales page, look up the Booking number on the bottom of the page you will find the Expenses tab. When opened we show all expenses that are added to the entire trip for Accounting to process them. The expenses are broken down by Leg, DEP Airport, ARR Airport and Other. The forms are editable.
Also note that all expenses that are marked as Taxable and/or Billable are added to the price matrix in the booking and ready to be invoiced, once the change is accepted by using the Overwrite Sold button.
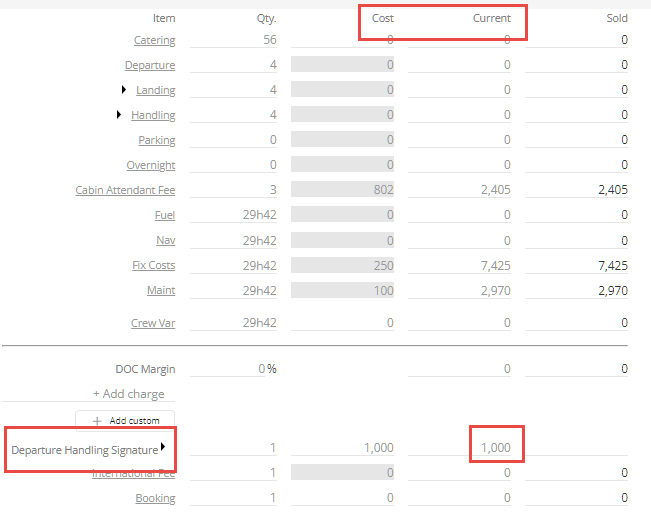
Accounting can open the Expenses and make any changes that are necessary, the system will update the related invoice and the Pricing matrix's Current column to show the changes compared to the Sold pricing.
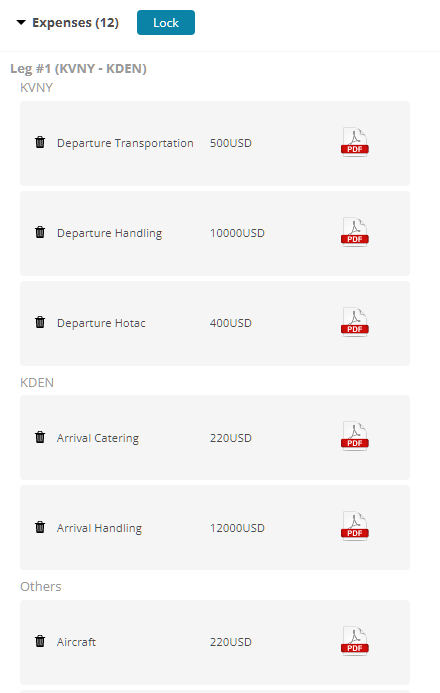
At some point Accounting can decide that no more expenses are accepted to be added to the Booking and can lock them with the Lock button. At this point no one can add more Expenses unless they get Unlocked.

Crew Expense Report
The new, updated report gives a better user experience with the new filter, and other features listed below:
- The Filtering gives you the choice of selecting custom, or regular dates, a specific aircraft, any Cost Type, find a particular Booking, or a crew member
- The Booking number is also a link to the related booking
- The Expenses in the report are broken down by Booking, Flight Leg, Departure and Arrival Airport and Other Expenses
When exporting into a PDF File, the system exports the list of the expenses and the related Attachments into one single document. It is handy when you select a single booking, print the PDF and you have everything you need in one document

Crew App Expenses
The crew can also add all expenses that are available in the webapp, inclusive the custom line items. As they open a flight on the bottom of each page where expense adding is available they see an Add Expense button. They tap on it and the system opens the same form as the one in the webapp. They can also see how many expenses were already added and what they are:
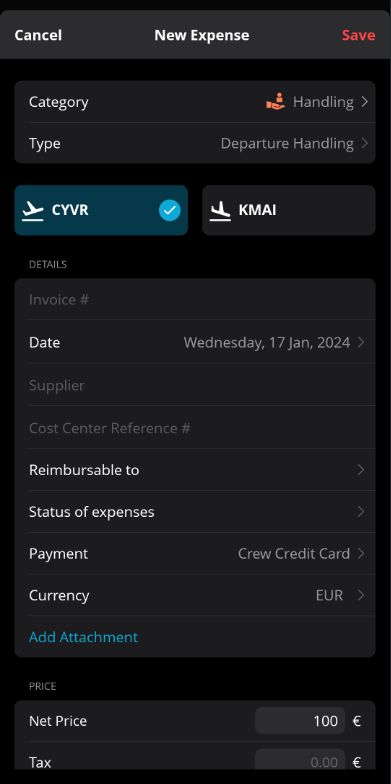
When a crew member taps on the Add expense button, the below form opens that they need to fill out in the same way as in the web app. They can also add attachments either from their devices, or they scan any document and attach it to the expense. On the different pages, we assign the cost type automatically. When the record is saved it is immediately synced to the web app on the related page.
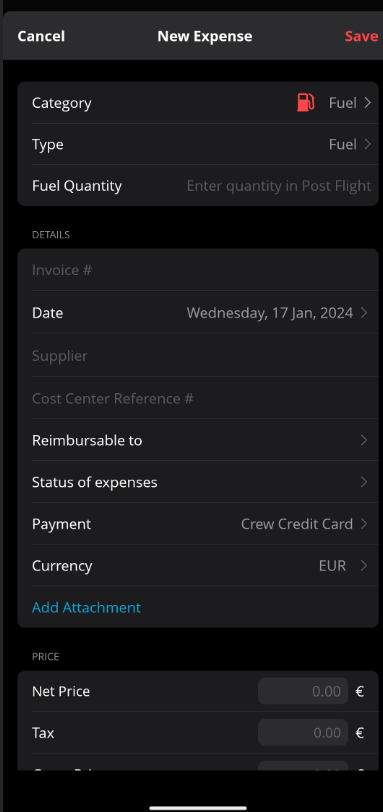
Non-Flight-Related Expenses
You can add aircraft and crew expenses, that are not related to a specific flight.
For Aircraft: Add expenses in any Maintenance event in Timeline
The Expense item can be filtered in the Report as Aircraft Task
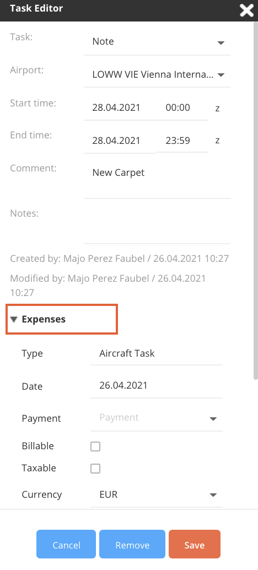
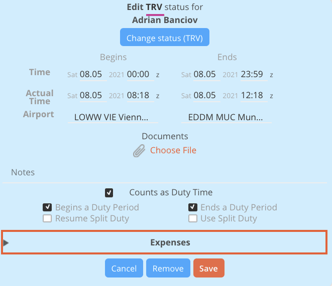
For Crew: Add expenses in any roster activity, keep in mind that the roster item has to be saved first then reopen it to have access to the expense form. In the report you will find those items when you select the Roster item from the Cost Type filter's drop down menu
Projects and Project IDs
Besides Expense Categories, FL3XX makes it possible to organize expenses in your organization using Projects. This feature can be additionally enabled by our support team.
You can add and modify projects in Expense Settings.

You can turn an existing Project Inactive, which takes it off from the list of active projects offered to your users in the adding expenses dialog window. Selecting a Project is obligatory.

